Chill & Shine: 51 Lighting Setups for Your Best Game Streams
Yo, fellow streamers! Ever rewatched your VOD and thought, "who is that shadowy figure trying to play games in the dark?" Yeah, we've all been there. Good lighting isn't just for Hollywood sets or those fancy TikTok creators; it's legit crucial for making your game streams pop and keeping your audience hooked. No one wants to watch a blurry, poorly lit face, right? So, let's ditch the potato-cam look and dive into some chill, easy-to-implement ways to light up your next stream like a pro, without needing a degree in cinematography or emptying your wallet.
Advanced Lighting Techniques for Pro-Level Streams
Once you’ve got the basics down, it’s time to level up your game with some advanced lighting techniques that can truly make your stream pop. We're talking about going beyond just a key light and a fill light to create a really polished, professional look that sets you apart from the crowd.
One fantastic technique is the classic three-point lighting setup, but then adding some extra flair. Think about incorporating a dedicated hair light. This light, usually placed behind and slightly above you, creates a subtle halo effect around your head and shoulders.
It helps separate you from your background, adding depth and making you stand out beautifully. It's a small touch that makes a huge difference in perceived production value. You’ll look like you’ve stepped right out of a professional studio, even if you're just chilling in your bedroom!
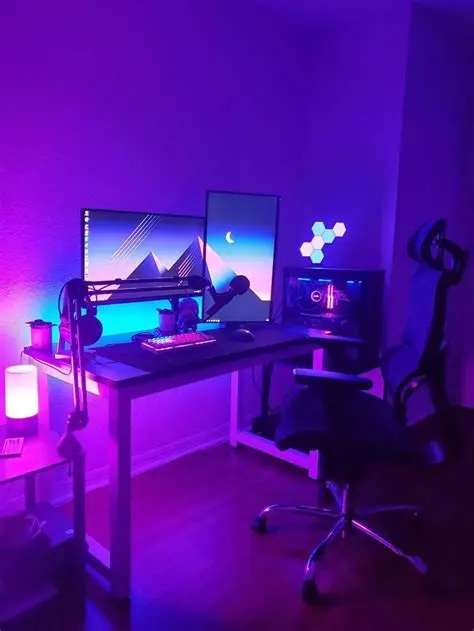
Another awesome trick is using colored accent lights. These aren't for illuminating you, but rather for adding mood and visual interest to your background. Imagine a strip of RGB LEDs behind your monitor, or a small colored spotlight hitting a cool poster or shelf.
You can match these colors to your game, your branding, or just your mood for the day. It creates a dynamic and immersive environment that keeps viewers engaged and makes your stream feel more alive. Don't be afraid to experiment with different hues!
For even more control, consider using diffusers and reflectors strategically. A diffuser softens light, preventing harsh shadows, while a reflector bounces light back onto your face, filling in any remaining dark spots without adding another light source.
They are incredibly versatile and relatively inexpensive tools that can drastically improve the quality of your lighting setup. Remember, good lighting isn't just about brightness; it's about control, direction, and creating a pleasing aesthetic for your audience.
Here’s a quick overview of how different lighting elements can enhance your stream:
| Lighting Element | Primary Purpose | Benefit for Streamers |
|---|---|---|
| Key Light | Main illumination of the subject. | Brightens face, defines features. |
| Fill Light | Softens shadows created by the key light. | Reduces harshness, creates even lighting. |
| Hair Light (Backlight) | Separates subject from background. | Adds depth, creates a professional halo effect. |
| Accent Lights | Adds color and mood to the background. | Enhances visual interest, matches branding/game. |
| Diffuser | Spreads and softens light. | Eliminates harsh shadows, provides a flattering glow. |
| Reflector | Bounces light back onto the subject. | Fills shadows naturally without more power. |
Software and Hardware Tools to Enhance Your Lighting
Getting your lights physically set up is just one part of the equation; controlling them seamlessly during your stream is where the real magic happens. Luckily, there's a whole world of software and hardware tools designed to make your lighting management a breeze, letting you focus on the game.
One of the most popular and incredibly useful pieces of hardware is the Elgato Stream Deck. This little gadget isn’t just for changing scenes or playing sound effects; it’s a powerhouse for lighting control too! Many smart lights, especially those designed for streamers like Elgato Key Lights, integrate directly with the Stream Deck.
Imagine being able to tap a button to turn your key light on or off, adjust its brightness, or even change its color temperature with a single press. It’s super efficient and makes on-the-fly adjustments during your stream effortless, keeping you in character and your flow uninterrupted.
Beyond dedicated streaming gear, smart home lighting systems like Philips Hue or Nanoleaf panels have become incredibly popular in streaming setups. While not always designed specifically for streamers, their extensive API and app support allow for deep customization.
You can sync these lights to react to your in-game events, your chat, or even music, creating an incredibly immersive experience for your viewers. Using their respective apps, you can easily set scenes, adjust colors, and schedule changes, all from your phone or PC.
Many smart lighting brands offer their own desktop or mobile applications for control. These apps usually provide a more granular level of control than a Stream Deck button, allowing you to fine-tune color values, saturation, and dynamic effects.
They’re fantastic for initial setup and creating complex scenes that you can then trigger with simpler commands later. Keeping these apps open on a second monitor can be super helpful for quick adjustments during a longer broadcast.
For those using professional studio lighting, you might even delve into DMX controllers. While a bit overkill for most home streamers, these systems offer unparalleled control over multiple lights, especially if you're rocking a truly elaborate setup.
They're typically used in stage and film productions, but some advanced streamers use simplified DMX interfaces to precisely manage complex lighting rigs. For the average gamer, though, a combination of smart lights, a Stream Deck, and dedicated apps will likely serve you wonderfully.
Budget-Friendly Lighting Hacks for Aspiring Streamers
Starting out as a streamer can be expensive, and buying all the fancy gear isn't always an option, especially when you're just testing the waters. But guess what? You don't need to break the bank to get decent, even great, lighting for your game streams.
There are tons of clever, budget-friendly hacks that can significantly improve your visual quality without draining your wallet. Let's dive into some awesome DIY options that will make you look like a pro on a shoestring budget.
One of the absolute best free resources for lighting is natural window light. If you have a window in your streaming space, try to position yourself facing it. Natural light is soft, even, and incredibly flattering, making you look fantastic without any extra equipment.
Just be mindful of the time of day – direct midday sun can be too harsh, while evening light might be too dim. A sheer curtain can act as a natural diffuser if the sun is a bit too bright, softening the light beautifully and making it much more forgiving on your face.
Another fantastic DIY option is creating your own softboxes. You can literally make a serviceable softbox out of a cardboard box, some aluminum foil, and a sheet of parchment paper or a white pillowcase. Line the inside of the box with foil to reflect light.
Cut a hole for a standard lamp fixture (like a clamp light you can get for under $10 at a hardware store), and then tape parchment paper over the front opening. This setup diffuses the light from a regular LED bulb, creating a soft, even glow similar to a professional softbox.
Don't overlook existing lamps in your home. A floor lamp or desk lamp can be repurposed into a fill light or a background accent. Just make sure the light isn't too harsh or yellow. Swapping out old bulbs for daylight-balanced LED bulbs (around 5000K-6500K) can dramatically improve their quality.
These bulbs are often quite affordable and provide a cleaner, more natural-looking light that’s perfect for streaming. They'll make you look more vibrant and less jaundiced than traditional warm incandescent bulbs.
Finally, keep an eye out for affordable LED strip lights or small LED panels online. You can often find decent quality, dimmable LED panels for under $30-$50 on sites like Amazon. These are great for adding accent lighting to your background or even serving as a compact fill light.
While they might not be as powerful as dedicated studio lights, they offer a lot of bang for your buck and can significantly elevate your stream's aesthetic. Remember, it's all about creativity and making the most of what you have!
Troubleshooting Common Lighting Issues
Even with the best intentions and carefully chosen gear, lighting can sometimes throw a curveball. From annoying glares to uninvited shadows, common issues can pop up and disrupt your perfectly planned stream aesthetic. But don't worry, most of these problems are easily fixable with a few simple tweaks!
One of the most persistent issues, especially for those of us who wear glasses, is glare. Those distracting reflections on your lenses can really pull focus from your face. The main culprit is often your key light being too directly aimed at your face or too bright.
Try slightly raising your key light above your eye level and angling it downwards. This change in angle can often shift the glare out of your camera's line of sight. Also, try moving the light slightly to the side; a subtle adjustment can make a huge difference.
If glare persists, consider adding a diffuser to your light source or reducing its intensity. Sometimes, it’s not about the angle, but simply too much direct light hitting a reflective surface. A dimmer switch is your best friend here!
Harsh shadows are another common headache. These often appear when your main light source is too small, too close, or too intense without adequate fill. Your goal is usually soft, flattering shadows, not sharp, dramatic ones.
To combat harshness, first, ensure your key light has some form of diffusion – a softbox, umbrella, or even a DIY parchment paper diffuser. Second, introduce a fill light or a reflector on the opposite side of your key light.
This will gently lift the shadows, making them much softer and more pleasing. Remember, the fill light should be less intense than your key light, just enough to soften, not to create a second set of shadows.
Color casts can make you look either sickly green, overly orange, or too blue, which is definitely not the vibe we're going for! This usually happens when your light sources have different color temperatures, or if your camera's white balance is off.
The easiest fix is to standardize your light bulbs. Aim for daylight-balanced LEDs, typically around 5000K-6500K, for all your primary lights. If you're mixing, say, a warm lamp with a cool ring light, your camera will struggle to balance them.
If your lights are consistent and you still have a cast, check your camera's white balance settings. Setting it to "daylight" or manually adjusting it to match your lights' Kelvin temperature will usually resolve the issue, giving you natural, true-to-life colors.
Finally, overexposure (too bright, washed out) or underexposure (too dark, muddy) are often camera settings issues rather than light issues. While good lighting helps, if your camera’s ISO, aperture, or shutter speed are wrong, your image will suffer.
Adjust your camera’s exposure settings. Lower your ISO first to reduce noise, then adjust your aperture (f-stop) to control depth of field and brightness, and finally, your shutter speed (keep it above 1/30s for smooth motion). Proper lighting gives your camera good information to work with, but the camera still needs to be told how to interpret it!
Your Lighting Questions Answered: An FAQ for Streamers
Got more questions about perfecting your stream's lighting? You're in good company! Many streamers run into similar dilemmas, and getting your lighting just right can feel like a bit of an art and a science. Here are some of the most common questions we hear, with answers to help you illuminate your path to streaming success!
Q1: What's the single most important light for a streamer?
A: Hands down, it's your key light. This is your main light source, and it's responsible for illuminating your face and making you visible to your audience. Invest in a good key light first, everything else is secondary, but still very important for that polished look.
Q2: Do I really need a fill light?
A: While not strictly mandatory, a fill light (or a reflector) is highly recommended. It helps soften the shadows created by your key light, making your face look more evenly lit and less dramatic. It really elevates the professional look.
Q3: Where should I place my key light?
A: Ideally, your key light should be placed slightly off-center (about 30-45 degrees to one side) and slightly above your eye level. This creates a natural, flattering light that sculpts your features nicely and reduces harsh shadows.
Q4: What color temperature is best for streaming?
A: Most streamers aim for "daylight" color temperatures, which are usually around 5000K to 6500K. This mimics natural sunlight, providing a clean, vibrant, and accurate color representation for your stream and webcam.
Q5: How do I avoid glare on my glasses?
A: Try moving your key light higher and angling it down, or move it further to the side. Sometimes, simply dimming the light slightly or adding more diffusion can also help immensely. Experiment with subtle position changes.
Q6: Can I use natural window light for streaming?
A: Absolutely! Natural window light can be incredibly flattering and free. Position yourself facing the window for the best results. Be aware that light quality changes throughout the day, so it might not be consistent. A sheer curtain can diffuse harsh midday sun.
Q7: Are RGB lights just for aesthetics, or do they serve a purpose?
A: Mostly aesthetics! RGB lights are fantastic for adding mood, branding, and visual interest to your background, enhancing the overall vibe of your stream. While they don't typically light your face, they make your setup look awesome and engaging.
Q8: What's a good budget-friendly light for a beginner?
A: A basic LED panel light with adjustable brightness and color temperature is a great start. You can often find decent ones for around $30-$50 online. Alternatively, a clamp light with a daylight LED bulb and a DIY diffuser works wonders.
Q9: How do I make my background look good without spending a lot?
A: Simple is often best! Tidy up your space, add a few personal items (like posters or action figures), and consider some cheap LED strip lights to add a splash of color. Even a well-placed houseplant can make a difference. Good lighting on the background itself helps!
Q10: My image is too dark, even with lights on. What gives?
A: This is likely a camera exposure issue. Check your webcam or camera settings. You might need to increase the ISO, open your aperture (lower f-number), or slow down your shutter speed. Your lights provide the light, but your camera needs to capture it correctly.
Q11: My image looks washed out/overexposed. How can I fix it?
A: Again, often a camera setting. Your ISO might be too high, or your lights might be too bright directly on your face. Try dimming your lights or adjusting your camera's exposure settings (lower ISO, higher f-number/smaller aperture, faster shutter speed).
Q12: Should I use a ring light?
A: Ring lights are popular, especially for beauty and makeup streamers, as they provide very even, shadowless light and a distinctive 'ring' reflection in your eyes. They can be great, but ensure it's large enough and positioned well to avoid harshness or making you look flat.
Q13: How far away should my lights be?
A: Generally, the closer your lights are, the softer the light will be (if diffused). However, too close can be overwhelming. A good starting point is about 2-3 feet away for your key light, adjusting based on its power and diffusion. Experiment to find your sweet spot.
Q14: What's the best way to control all my lights easily?
A: Smart lighting solutions (like Philips Hue) combined with a control surface like the Elgato Stream Deck are fantastic. This allows you to program scenes and adjust individual lights with a simple button press, keeping your focus on streaming.
Q15: How can I create depth in my stream's lighting?
A: Depth comes from separating yourself from the background. A hair light (backlight), accent lights on your background, and avoiding flat, frontal lighting are key. Think about lighting in layers: you, then your immediate background, then the far background. This creates visual interest and makes your space look more dynamic.
Time to Shine!
So, there you have it! Getting your lighting just right might seem like a small detail, but it truly makes a world of difference for your game streams. From looking more professional to just making your viewers feel more comfortable watching you, a little effort here goes a long way. Thanks so much for hanging out and reading through these tips. Hopefully, you've picked up a trick or two to brighten up your own setup! Don't be a stranger – swing by again soon for more gaming tech goodness.